10 Best Normal-Type Fusions in Pokémon Infinite Fusion, Ranked
What are the best normal type fusions in Pokémon Infinite Fusion? The short answer: Snorlax + Dusclops (Normal/Ghost, immune to three types, weak to only Dark) is the best overall normal fusion, Porygon-Z + Noivern (Normal/Dragon, Adaptability Boomburst) is the best offensive one, and Slaking + Zangoose (pure Normal, Toxic Boost, ~130 Attack) is the best pure-Normal attacker. This guide ranks the 10 best normal-type fusions in Pokémon Infinite Fusion for your team, with exact head/body orders, resulting typings, formula-estimated stats, ability choices, and build paths in version 6.7.2. No dedicated normal-type fusion guide exists anywhere else, and the general best-fusion lists either include one token normal pick or get the typing wrong, so every pick below is built on the current fusion math.
Quick note: pokemon-infinitefusions.site is an unofficial fan guide. We are not affiliated with Nintendo, Game Freak, or the creators of Pokémon Infinite Fusion.
Normal’s Only Weakness Is the Whole Strategy
Normal has the simplest defensive profile in the game: weak to Fighting, immune to Ghost, and resistant to nothing. One weakness sounds like a strength, and defensively it is, but the offensive side is the problem. Normal attacks hit nothing super effectively, bounce off Rock and Steel, and do literally nothing to Ghost types. That is why most players dismiss normal fusions before building one.
The dismissal is a mistake, because fusion lets you keep Normal’s single-weakness defense while outsourcing the offense. A Normal/Ghost fusion is immune to Normal, Fighting, and Ghost attacks and weak to only Dark. A Normal/Steel fusion picks up nine resistances and two immunities. The STAB moves are stronger than people remember too: Return, Facade, and Double-Edge hit hard off a high Attack stat, and Boomburst is a 140-power special nuke that ignores Substitute. Normal does not need super-effective coverage when its neutral hits land this hard.
The pattern across the ten picks is the lesson: keep a Normal head for the defensive profile and the HP, then pick a body whose donated type erases the Fighting weakness or adds a real offensive STAB. Every pick below follows the 6.7.2 typing rules with the anti-redundancy rule applied, and every stat is a formula estimate from the parents’ official base stats.
The Staraptor Trap: Heads That Look Normal but Aren’t
Here is the single most important rule for this list, and the one no competitor explains. In version 6.x, any Normal/Flying head always donates Flying, never Normal. The Fandom wiki’s fusion FAQs confirm this is the only surviving “dominant type” rule: Pidgeot, Fearow, Dodrio, Swellow, and Staraptor heads all give Flying. So Staraptor (head) + anything is a Flying fusion, not a normal fusion, no matter what a fusion calculator’s sprite preview suggests. If you built a “normal” team around a Staraptor head, you built a Flying team.
This also means the reverse: heads like Girafarig (Normal/Psychic), Drampa (Normal/Dragon), and Meloetta (Normal/Psychic) genuinely donate Normal, because Normal is their primary type and the Flying exception does not apply to them. Pure-Normal heads (Snorlax, Blissey, Slaking, Porygon-Z, Exploud, Kangaskhan, Zangoose, Smeargle, Porygon2, Tauros) are the safest picks on this list.
One more ordering subtlety: when both parents are pure Normal, the body has no secondary type to donate, so it donates its primary Normal instead, and the two Normal typings collapse into a pure-Normal fusion. Snorlax head + Blissey body is pure Normal, not Normal/Normal. Three of the ten picks below use this on purpose, because a single Fighting weakness on a 190-HP frame is a legitimate defensive typing. Verify every order in the Pokémon Infinite Fusion calculator before you fuse.
The Stat Math: Normal Builds From the Top and the Bottom
The 2/3 rule: Attack, Defense, and Speed lean two-thirds toward the body, while HP, Special Attack, and Special Defense lean two-thirds toward the head. Normal’s best stat sticks all sit on the head side of that split: Blissey’s 255 HP, Snorlax’s 160 HP, Porygon-Z’s 135 Special Attack, Exploud’s 104 HP and 91 Special Attack. That is why nine of the ten picks put the normal parent on top.
The body slot is where the Attack comes from, and this is where Slaking stops being a joke. Slaking’s 160 Attack with Truant is unplayable alone, but a fusion lets you choose the other parent’s ability instead, which deletes Truant from the equation entirely. Slaking as a body donates two-thirds of 160 Attack to anything. That single interaction powers two picks on this list, and no general best-fusions guide connects it to normal-type building.
The ability choice deserves emphasis because it decides more builds than raw stats. When you fuse, you pick between the two abilities the parents actually had, which means Scrappy, Adaptability, Poison Heal, Toxic Boost, and Thick Fat are all on the table if the right parent carries them. Read our Pokémon fusion tool guide for worked examples of the stat math before you commit splicers to a build.
The 10 Best Normal Fusions, Ranked
Every pick uses the 6.7.2 fusion rules. Stats are formula estimates: Attack, Defense, and Speed use two-thirds of the body’s base stats plus one-third of the head’s, and HP, Special Attack, and Special Defense use two-thirds of the head’s plus one-third of the body’s. Roles are what separate picks that share a typing, so read the role, not just the type line.
#1 Snorlax (Head) + Dusclops (Body): The Three-Immunity Wall
Resulting type: Normal/Ghost. Snorlax’s head donates Normal, Dusclops’s body donates Ghost (pure Ghost, so its primary is used), and the result is the best defensive typing available to any normal fusion: immune to Normal, Fighting, and Ghost, resistant to Poison and Bug, and weak to only Dark. Normal’s single Fighting weakness is gone, neutralized by Ghost’s Fighting resistance, and the Ghost immunity Normal already had stacks with two more.
Stats land around 120 HP, 108 Defense, 117 Special Defense, and 27 Speed. The 27 Speed is irrelevant on a wall. The 108/117 defenses sit on a 120-HP frame, and here is the part the competitive community figured out first: because Dusclops is not fully evolved, this fusion can hold Eviolite, which boosts both defenses further (the item gives 25 percent in this game instead of 50). The Blissey/Dusclops variant of this concept is documented on competitive forums; the Snorlax version trades some Special Defense for far more physical bulk and a real Attack stat.
Ability: Thick Fat (Snorlax) halves Fire and Ice damage, which covers two of the coverage types people bring for Ghosts. Pressure (Dusclops) is the stall alternative, draining PP from the defensive matchups. Curse, Body Slam, Rest, and Will-O-Wisp or Pain Split is the set. Curse patches the 83 Attack and the Defense simultaneously; Will-O-Wisp from the Dusclops side cripples the physical attackers that Dark coverage usually comes from.
What it beats: anything relying on Normal, Fighting, or Ghost STAB, which is a huge slice of the game, plus special attackers it walls with 117 Special Defense. What threatens it: Dark types and strong Dark coverage, Taunt (it hates being unable to Rest or Will-O-Wisp), and setup sweepers that ignore burns. Keep a Fighting or Fairy resist behind it for the Dark weakness.
#2 Porygon-Z (Head) + Noivern (Body): The Adaptability Cannon
Resulting type: Normal/Dragon. Porygon-Z’s head donates Normal, Noivern’s body donates Dragon (its secondary type). This is the famous Boomburst build the competitive community documented: roughly 122 Special Attack and 112 Speed backing a STAB Boomburst that Adaptability (Porygon-Z’s ability) boosts to effectively 280 base power, with Nasty Plot to go further and Roost plus Tailwind for support. The 112 Speed outspeeds most of the story mode and a healthy chunk of the post-game.
Stats land around 122 Special Attack, 112 Speed, 85 HP, and 77/77 defenses. The defenses are the honest price: this fusion does not switch into anything it does not resist. Normal/Dragon is weak to Fighting, Ice, Dragon, and Fairy, but it resists Fire, Water, Electric, and Grass, which gives it safe switch-ins against the types that usually punish normal fusions.
Ability: Adaptability (Porygon-Z) is the entire concept: double STAB turns Boomburst into the strongest spammable move in the game. Download (Porygon-Z’s other ability) is the backup if you want a free Special Attack boost against physically defensive teams. Boomburst, Nasty Plot, Roost, and Dragon Pulse or Tailwind is the set. Set up Nasty Plot on a forced switch, then click Boomburst until the game ends.
What it beats: anything that does not resist Normal after a Nasty Plot, which is nearly everything, plus the Fire, Water, Electric, and Grass types it resists on the switch. What threatens it: faster Dragon, Ice, and Fairy types, priority moves (they ignore the 112 Speed), and Ghost types, which are immune to Boomburst. Never stay in on a Ghost.
#3 Slaking (Head) + Scizor (Body): Truant Deleted
Resulting type: Normal/Steel. Slaking’s head donates Normal, Scizor’s body donates Steel (its secondary type; the old type-swap that made Scizor Steel/Bug was reverted in 6.0). The concept is one line: keep two-thirds of Slaking’s 160 Attack and 150 HP, then choose Scizor’s ability so Truant never enters the picture. Around 140 Attack on a Normal/Steel frame with nine resistances and immunities to Poison and Ghost.
Stats land around 140 Attack, 100 Defense, 123 HP, 70 Special Defense, and 77 Speed. The 140 Attack is the highest physical stat on this list. The typing’s only real scar is a 4x Fighting weakness (both Normal and Steel are weak to Fighting), plus Fire and Ground. Everything else bounces off.
Ability: Technician (Scizor) turns Bullet Punch into a priority nuke off 140 Attack, which patches the 77 Speed against faster Fighting types, the exact matchup this fusion fears. Swarm is the backup for low-HP X-Scissor plays. Swords Dance, Bullet Punch, Iron Head, and U-turn or X-Scissor is the set. Swords Dance on a free switch turns the 140 Attack into a sweep; Bullet Punch picks off the faster threats before they exploit the Fighting weakness.
What it beats: everything its resistances wall, plus Rock, Ice, and Fairy types offensively. What threatens it: Fighting types above all (the 4x weakness), Fire and Ground coverage, and faster special attackers targeting the 70 Special Defense. One Fighting resist on the team and this fusion has almost no losing matchups.
#4 Snorlax (Head) + Gliscor (Body): The Competitive Scene’s Pick
Resulting type: Normal/Flying. Snorlax’s head donates Normal, Gliscor’s body donates Flying (its secondary type). This is “Snorcor,” one of the most popular fusions on the Infinite Fusion competitive scene: Gliscor’s Poison Heal plus a Toxic Orb turns poison into healing, and Facade becomes a 140-power STAB move on a 132-HP frame. Normal/Flying is immune to Ground and Ghost, resists Bug and Grass, and is weak to Ice, Rock, and Electric.
Stats land around 132 HP, 100 Attack, 105 Defense, 75 Special Defense, and 73 Speed. The 105 Defense plus Poison Heal recovery makes this fusion brutally hard to break physically, and the 100 Attack with a 140-power STAB Facade means it is never passive. The community tech is real: this exact archetype is documented as a ladder staple, not a theorycraft.
Ability: Poison Heal (Gliscor) is non-negotiable; it is the healing engine and the Facade doubler in one slot. Thick Fat (Snorlax) is the backup if you would rather halve Fire and Ice damage, but you lose the identity of the build. Facade, Earthquake, Roost, and Swords Dance or Ice Fang is the set. Hold a Toxic Orb, protect on turn one if you need the poison safely, then start swinging a 140-power STAB move with recovery.
What it beats: physical attackers that cannot break 105 Defense plus Poison Heal recovery, Ground types (immune) and Fighting types (neutral, since Flying resists Fighting), and anything slower that eats a boosted Facade. What threatens it: Ice and Rock coverage (common on the physical attackers it wants to wall), faster Electric types, and Trick or Switcheroo removing the Toxic Orb.
#5 Snorlax (Head) + Blissey (Body): The Classic That Still Works
Resulting type: Normal. Both parents are pure Normal, so the body donates its primary Normal and the typings collapse into a pure-Normal fusion. This is the pick every general best-fusions list includes, and it earns the slot: roughly 192 HP and 118 Special Defense with a single Fighting weakness. It is the simplest build on this list and one of the most effective.
Stats land around 192 HP, 118 Special Defense, 68 Special Attack, 47 Speed, and a genuinely bad 28 Defense. The 28 Defense is the honest check on this pick: it walls every special attacker in the game and folds to any serious physical hit. That is not a flaw in the ranking; it is the reason the #1 pick exists. Build this when your team already has physical walls and needs a special sponge.
Ability: Thick Fat (Snorlax) halves Fire and Ice damage, patching two common special coverage types. Natural Cure (Blissey) is the alternative, curing status on switch-out, which pairs well with Rest. Curse, Body Slam, Soft-Boiled, and Seismic Toss or Toxic is the set. Curse is the tech that fixes the 28 Defense over a few turns while boosting the 43 Attack into relevance; Seismic Toss deals fixed damage that ignores the low offenses entirely.
What it beats: special attackers of every type, stall matchups, and anything that cannot hit the physical side. What threatens it: physical Fighting types above all, strong physical attackers generally, and Taunt. Never leave it in on a physical sweeper.
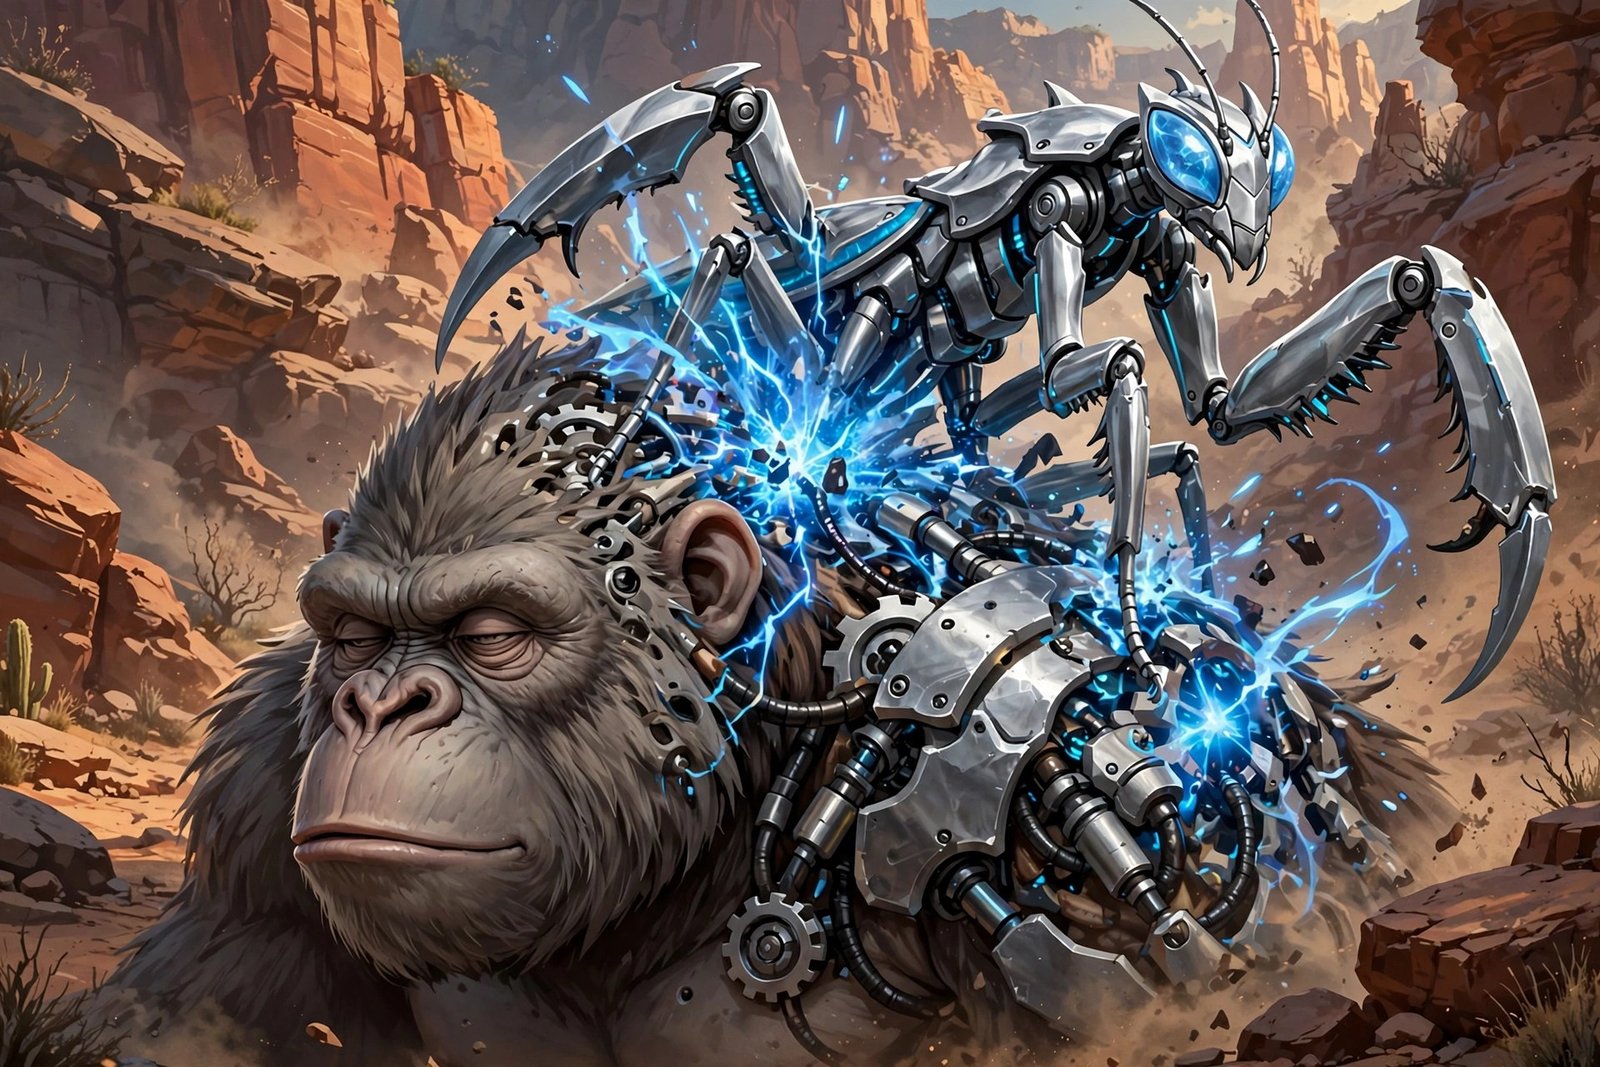
#6 Exploud (Head) + Gengar (Body): The Ghost-Proof Nuke
Resulting type: Normal/Poison. Exploud’s head donates Normal, Gengar’s body donates Poison (its secondary type in 6.x; the old Ghost-dominant rule was a 5.x mechanic). The concept: Scrappy (Exploud’s hidden ability) lets Normal moves hit Ghost types, which deletes the one immunity that walls every other normal attacker on this list. Boomburst is sound-based, so it also ignores Substitute. A 140-power STAB move with no immunities and no Substitute counterplay.
Stats land around 104 Special Attack, 96 Speed, 89 HP, and 61/74 defenses. Nothing here is bulky, and that is fine: this is a wallbreaker, not a tank. Normal/Poison is weak to Ground and Psychic, resists Bug, Fairy, Grass, and Poison, and is immune to Ghost. The Ghost immunity plus Scrappy is the funny part: Ghost types cannot hit it super effectively, and it hits them back with STAB.
Ability: Scrappy (Exploud, hidden) is the entire pick; without it, Ghosts wall you completely. Soundproof (Exploud) is the backup against opposing sound moves and it blocks your own… no, Soundproof only blocks incoming sound moves, and it does nothing for the Ghost problem, so only take it if your team already handles Ghosts. Boomburst, Shadow Ball, Sludge Bomb, and Thunderbolt is the set. Shadow Ball and Sludge Bomb come from the Gengar side and give you coverage against the Rock and Steel types that resist Boomburst.
What it beats: Ghost types (the irony), Substitute users, and anything frail that a 140-power STAB move catches. What threatens it: faster Ground and Psychic types, priority moves, and anything that can take one Boomburst and hit back; the 61 Defense does not forgive mistakes. Bring it in on a free switch, not into an attack.
#7 Kangaskhan (Head) + Machamp (Body): The Scrappy Brawler
Resulting type: Normal/Fighting. Kangaskhan’s head donates Normal, Machamp’s body donates Fighting (pure Fighting, so its primary is used). Around 128 Attack with Scrappy, which means both STABs hit Ghost types: Normal/Fighting coverage with no immunities to hide behind. This is the earliest viable offensive normal fusion on the list and the most straightforward to play.
Stats land around 128 Attack, 100 HP, 87 Defense, 82 Special Defense, and 70 Speed. The 70 Speed is the honest check: it outspeeds walls and slower attackers but loses to real sweepers, which is why the moveset carries priority and a Choice Scarf option. Normal/Fighting is weak to Fighting, Flying, Psychic, and Fairy, which is a real list, but the offensive coverage hits Normal, Rock, Steel, Ice, and Dark super effectively.
Ability: Scrappy (Kangaskhan) is the pick that defines the build: Ghost immunity to your STABs disappears. No Guard (Machamp) is the alternative that makes DynamicPunch, a 100-power Fighting move that confuses, always hit; check your Machop’s ability before fusing. Fake Out, Return, DynamicPunch or Cross Chop, and Sucker Punch or Stone Edge is the set. Fake Out plus Sucker Punch gives you two priority moves to work around the 70 Speed.
What it beats: Normal, Rock, Steel, Ice, and Dark types, Ghost types that expected a free switch-in, and slower setup sweepers that Fake Out disrupts. What threatens it: faster Fighting, Flying, Psychic, and Fairy types, and anything that can take a hit and hit back harder. This is a mid-game brawler with a hard late-game expiry date; enjoy it, then replace it.
#8 Slaking (Head) + Zangoose (Body): The Pure-Normal Wallbreaker
Resulting type: Normal. Both parents are pure Normal, so the fusion collapses to pure Normal with a single Fighting weakness. The concept is the meanest on this list: two-thirds of Slaking’s 160 Attack plus two-thirds of Zangoose’s 115 Attack lands around 130 Attack, and Toxic Boost (Zangoose’s ability) multiplies it by 1.5 while holding a Toxic Orb. That is effectively 195 Attack behind a STAB Facade, which doubles to 140 power when poisoned.
Stats land around 130 Attack, 124 HP, 93 Speed, and 73/63 defenses. The 93 Speed is genuinely good: it outspeeds most walls and mid-tier attackers, so unlike the slower picks, this one does not need priority to function. The poison chip is the honest cost: 1/8 of your HP per turn means you are on a timer, so this fusion breaks walls open and then gets out, it does not stay in for long games.
Ability: Toxic Boost (Zangoose) is non-negotiable; it is the multiplier the whole build is named for. Immunity (Zangoose’s other ability) is the backup if you hate the poison timer, but you lose the identity of the pick. Facade, Close Combat, Shadow Claw, and Swords Dance or Quick Attack is the set. Facade is the main STAB at 140 power; Close Combat covers the Rock and Steel types that resist it; Shadow Claw hits the Ghosts that are immune to it.
What it beats: walls, stall teams, and anything that cannot outspeed 93 Speed and survive a boosted Facade. What threatens it: faster Fighting types, priority moves, Ghost types if you drop Shadow Claw, and the poison timer itself. This is a wallbreaker, not a sweeper; bring it in, break something, bring it out.
#9 Porygon2 (Head) + Steelix (Body): The Trace Tank
Resulting type: Normal/Ground. Porygon2’s head donates Normal, Steelix’s body donates Ground (its secondary type). The headline number is around 163 Defense on an 82-HP frame with Recover from the Porygon2 side, which makes this the best physical wall among the normal fusions that can also attack back. Normal/Ground is immune to Ghost and Electric, resists Poison and Rock, and is weak to Fighting, Water, Grass, and Ice.
Stats land around 163 Defense, 88 Special Attack, 85 Special Defense, 82 HP, and 48 Speed. The 48 Speed is glacial, which is why this pick does not try to outspeed anything: it switches in on something it walls, clicks Curse or attacks, and dares the opponent to break 163 Defense. The Electric immunity is a real bonus on a normal fusion, since Electric coverage is one of the common answers to the Flying-type partners normal teams like.
Ability: Trace (Porygon2) is the fun pick: copy the opponent’s ability on switch-in, which randomly wins matchups against ability-reliant teams. Sturdy (Steelix) is the consistent pick, guaranteeing you survive any single hit at full HP. Curse, Earthquake, Recover, and Stone Edge or Return is the set. Curse boosts the 83 Attack and the already absurd Defense; Recover plus 163 Defense stalls out most physical attackers in the game.
What it beats: physical attackers without super-effective coverage, Electric types (immune), and Ghost types that expected a free switch. What threatens it: Water, Grass, and Ice coverage, special attackers targeting the merely good 85 Special Defense, and Taunt shutting down Curse and Recover. A Grass resist on the team covers the most common answer.
#10 Smeargle (Head) + Blissey (Body): The Sketchbook Support
Resulting type: Normal. Smeargle’s head donates Normal, Blissey’s pure-Normal body donates Normal, and the fusion collapses to pure Normal. The concept is the weirdest on this list: Smeargle’s Sketch can copy literally any move in the game, and Blissey’s body donates two-thirds of 255 HP, landing around 122 HP. The result is the best support movepool in the game on a frame that can actually take a hit: Spore, Shell Smash, Baton Pass, Stealth Rock, Sticky Web, any of it.
Stats land around 122 HP, 68 Speed, 68 Special Defense, and a genuinely shocking 10 Defense and 13 Attack. Be honest about what this is: it cannot attack and it cannot take a physical hit. It leads, puts something to sleep, sets up hazards or passes boosts, and gets out. The 122 HP plus 68 Special Defense means it usually survives one special hit, which is all a support lead needs.
Ability: Own Tempo (Smeargle) blocks confusion, which matters when you are setting up in front of everything. Moody (Smeargle’s hidden ability) is the degenerate option: random stat boosts every turn behind Substitute and Protect, which competitive play banned for a reason; it works in-game if your conscience allows it. Spore, Shell Smash, Baton Pass, and Stealth Rock is the set. Sketch each move from wild Pokémon or trainers before you fuse, since the fusion keeps the sketched moves.
What it beats: unprepared teams, anything slower that eats a Spore, and setup matchups where a passed Shell Smash ends the game. What threatens it: faster Taunt users (the hard counter to every support lead), priority moves, Magic Bounce, and any physical attacker at all. This is a specialist tool for planned teams, not a generalist.
Covering the Fighting Weakness
Normal’s single weakness is Fighting, and the pattern across the ten picks is the lesson in how to handle it. Ghost bodies and typings (Dusclops, and the Ghost immunity Normal already has) erase the weakness entirely: Normal/Ghost takes neutral Fighting damage and is immune to three types. Flying partners resist Fighting, which is why Normal/Flying (#4) and a Flying teammate both work. Fairy and Psychic teammates hit Fighting types super effectively, covering the weakness offensively instead of defensively.
When you build outside this list, pick the answer to Fighting first, then cover the rest with teammates. A pure-Normal wall still fears Fighting, so the next team slot should be a Ghost, Flying, Psychic, or Fairy partner. A Normal/Steel fusion still fears Fighting at 4x, so that team wants two Fighting answers, not one. Build the support before the fusion, not after. Our team builder guide covers slotting a normal core into a full six without stacking weaknesses.
Testing Both Orders on a Splicer Budget
Fusions cost splicers, and splicers cost money: DNA Splicers run ¥300 at the Poké Mart, Super Splicers ¥1000 after four badges, and the Infinite Splicer key item (earned by beating the robot in the Cinnabar lab) makes refusion free. DNA Reversers cost ¥300 and flip a fusion’s head/body order, which is the cheapest way to test both orders of a pairing. Remember that flipping the order usually loses the Normal typing entirely: Slaking head + Scizor body is Normal/Steel, but Scizor head + Slaking body is Bug/Normal. The order is the whole decision.
The workflow that wastes nothing: plan the order in the fusion calculator, fuse with a regular DNA Splicer, check the ability you received, and use a DNA Reverser if the order needs flipping. Never fuse blind on a build that needs a specific ability; the ability choice is the difference between the #3 Truant-free Slaking working and failing. If you are starting fresh for a normal-focused run, download Pokémon Infinite Fusion version 6.7.2 first and confirm your patch before spending anything.
Where the Normal Parents Come From
Snorlax, Kangaskhan, Tauros, and the Porygon line are Kanto encounters and gifts, available across the early and mid-game. Blissey and Chansey come from the Johto side. Slaking’s Slakoth is available fairly early, which makes the Truant-deleting builds accessible sooner than their power suggests. Dusclops, Gliscor, Scizor, Gengar, and Machamp are all standard encounters or trades across the two regions; none of the ten picks needs a legendary or a post-game exclusive.
Do not trust third-party encounter tables for specifics; many were written for older versions and the details drift. Check the exact encounter data in our Infinite Fusion Pokédex, which tracks the current version.

Normal Fusion Questions, Answered
What is the best normal-type fusion in Pokémon Infinite Fusion?
Snorlax head + Dusclops body (#1) is the best overall: Normal/Ghost typing with immunities to Normal, Fighting, and Ghost and a single Dark weakness, on a 120-HP wall that can hold Eviolite. For pure offense, Porygon-Z head + Noivern body (#2) with Adaptability Boomburst is the strongest normal attacker in the game.
Why isn’t Staraptor a normal-type fusion head?
Because of the dominant-type rule: in version 6.x, every Normal/Flying head always donates Flying, never Normal. Staraptor, Pidgeot, Swellow, Fearow, and Dodrio heads all produce Flying fusions. The Fandom wiki’s fusion FAQs confirm this is the only surviving exception of its kind. Use a pure-Normal head (Snorlax, Slaking, Blissey) if you want the Normal typing.
Can normal fusions hit Ghost types?
Yes, three ways. Scrappy (Kangaskhan, Exploud) lets Normal and Fighting moves hit Ghosts, which is why #6 and #7 run it. Foresight and Odor Sleuth remove the immunity temporarily. Or just hit them with your coverage STAB: every dual-typed pick on this list carries a second STAB that Ghosts do not ignore.
Is pure Normal worth using, or should I always add a second type?
Pure Normal is legitimately good because its only weakness is Fighting. Three picks on this list (#5, #8, #10) stay pure Normal on purpose. The second type is worth it when it erases the Fighting weakness (Ghost), adds key resistances (Steel), or brings a real offensive STAB (Dragon, Fighting). Do not add a second type just to have one; a bad second type adds weaknesses without paying for them.
What ability should I pick for a Slaking fusion?
Anything except Truant. The fusion lets you choose either parent’s ability, so Slaking’s 160 Attack and 150 HP come with none of the downside as long as the other parent has something useful. Technician (Scizor, #3) and Toxic Boost (Zangoose, #8) are the two best answers on this list. Check which ability the Slaking parent has before fusing, because the choice is locked to the two abilities the parents actually had.
Which normal fusion is best for a Nuzlocke?
Snorlax head + Blissey body (#5) is the safest Nuzlocke pick: 192 HP, 118 Special Defense, Soft-Boiled recovery, and only one weakness. If your run already has special walls, Snorlax head + Dusclops body (#1) is even harder to kill. Avoid the setup sweepers (#2, #8, #10) in Nuzlockes; they need free turns that hardcore rules rarely give.
Sources: fusion typing and stat rules from the Infinite Fusion Fandom wiki (Fusion FAQs); game version 6.7.2 confirmed via the official wiki main page; Snorlax base stats and Thick Fat mechanics from Bulbapedia; Porygon-Z base stats and Adaptability mechanics from Bulbapedia.